
Arm Optimize™ Program
Course Curriculum
The 4-week journey
Each week has a live coaching session, video modules, a step-by-step clinician guide, and a recorded Q&A.
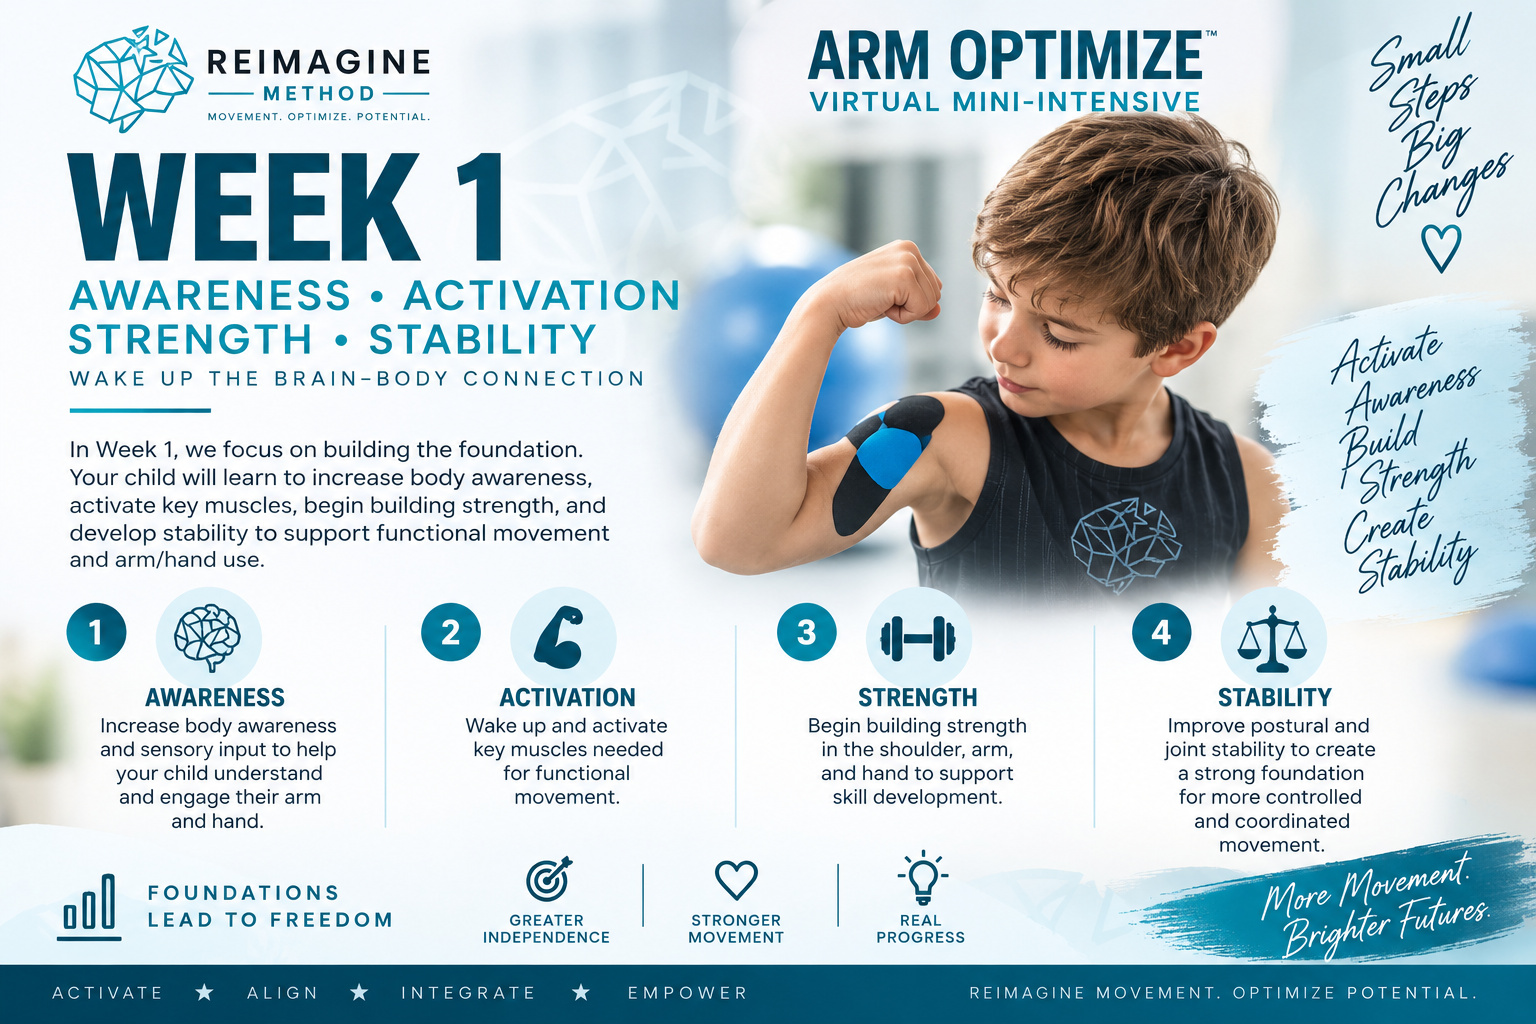
Week 1
Awareness, Activation, Strength & Stability
Wake Up the Brain–Body Connection
Week 1 wakes up the connection between brain and body. We build awareness of the limb, activate the muscles that have gone quiet, and establish the strength and stability everything else is built on.
- Build body awareness of the arm and hand
- Activate the key muscles of the shoulder, arm, and hand
- Build shoulder, arm, and hand strength
- Establish postural and joint stability
Foundations Lead to Freedom
Week 1 goal
Wake up awareness and activation, and build the strength and stability that make skilled movement possible.
AWARENESS
Notice the limb
ACTIVATION
Wake the muscles
STRENGTH
Build capacity
STABILITY
Hold the base
Weekly live coaching
Live coaching: activation sequencing, handling for POEE, and dosing the first week.
Clinician guide
Clinician guide: Week 1 activation and stability protocol with progression criteria.
Members only — sign in to downloadQ&A recording
Q&A recording: taping questions, tolerance, and what to do when a child refuses weight-bearing.
Week 1 demonstration videos
Playback, download and printing are available to course members.
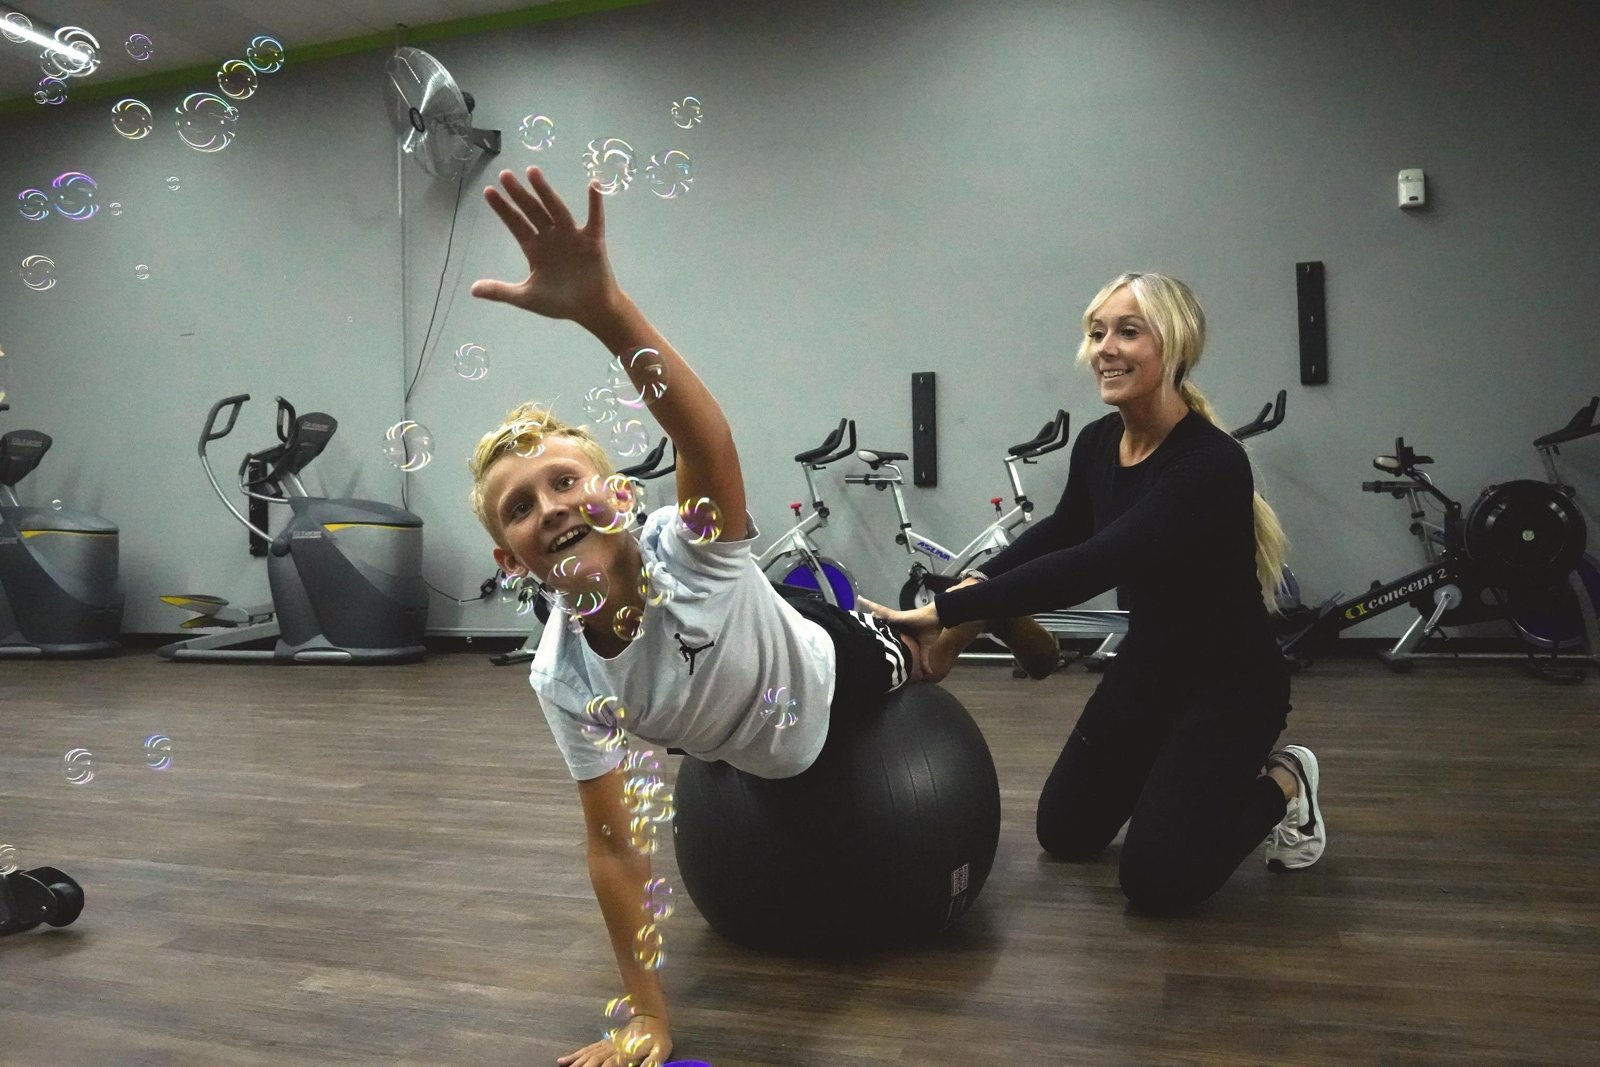
Week 1 — Activation & Tools Guide
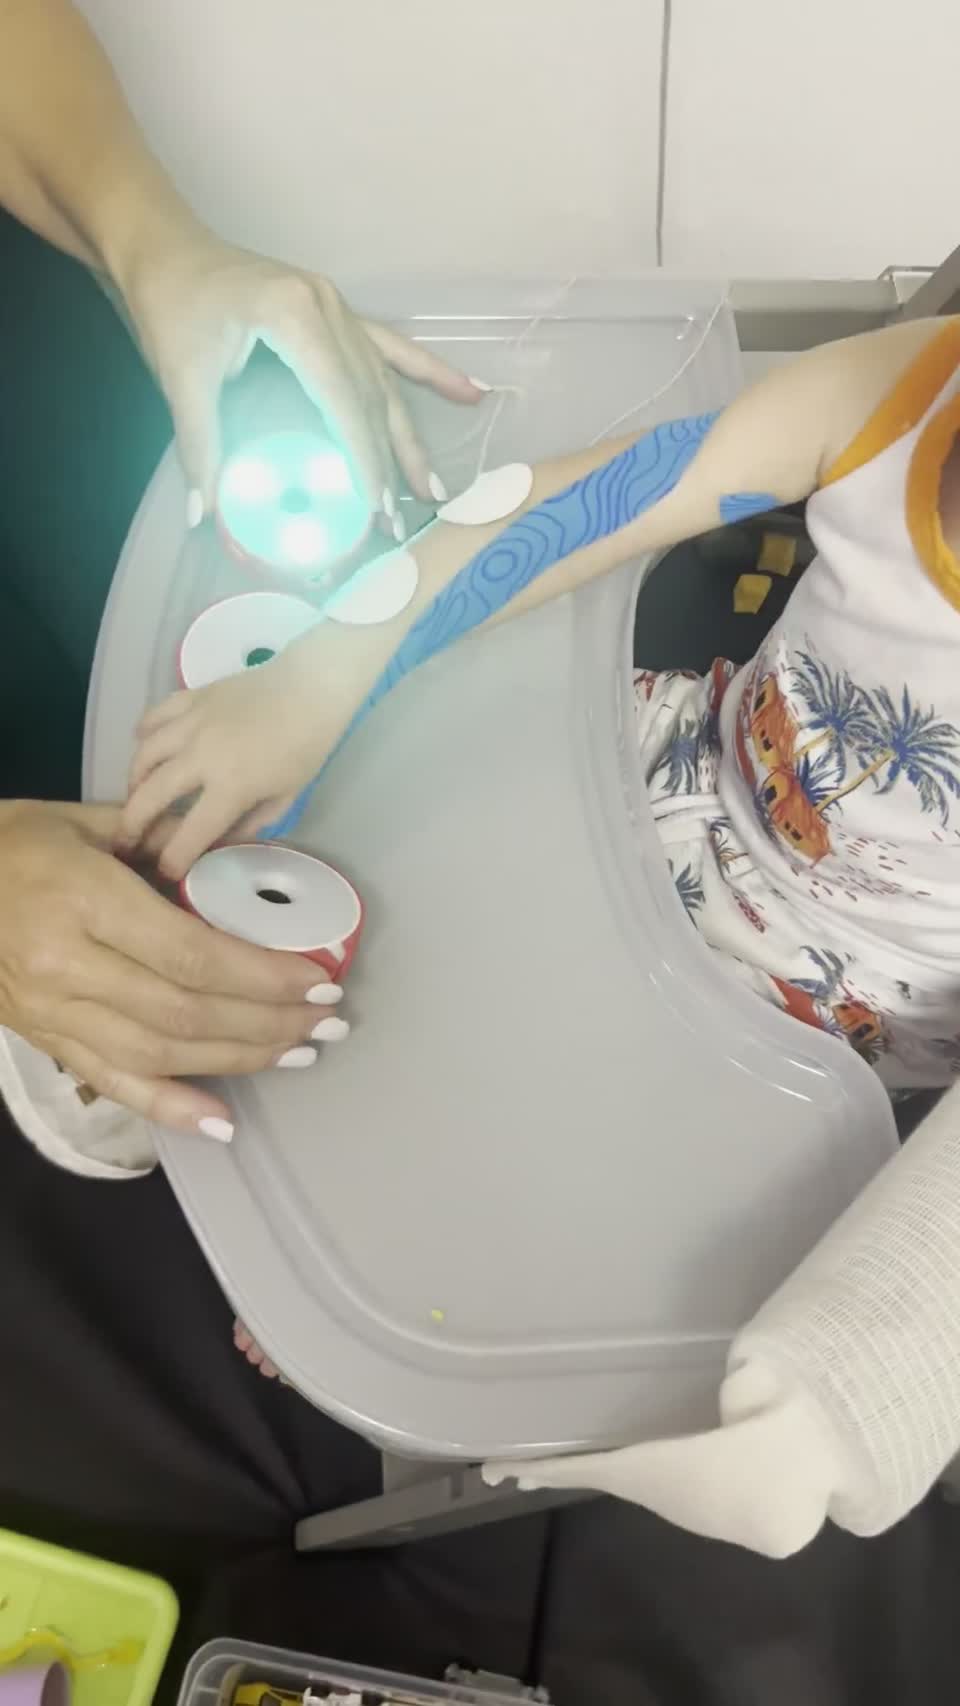
Kinesiotape with Tap-Light Reaching
Brain Tape is applied to cue the shoulder and forearm, then a lit target gives the child an immediate reason to reach. Sensory input first, purposeful movement second.
Coaching cues
- Apply tape with the limb in the lengthened position, then anchor without stretch at each end.
- Set the target just outside easy range so reaching requires forward weight shift, not trunk collapse.
- Cue at the elbow, not the hand — let the child own the last third of the reach.
- Reward every attempt with the light and a short verbal mark: "you got it."
Key takeaways
- Tape is a cue, not a brace — it primes attention to the limb.
- A high-salience target buys you far more repetitions than a verbal request.
- Pair activation with something the child wants to touch.
Playback, download and printing are available to course members.
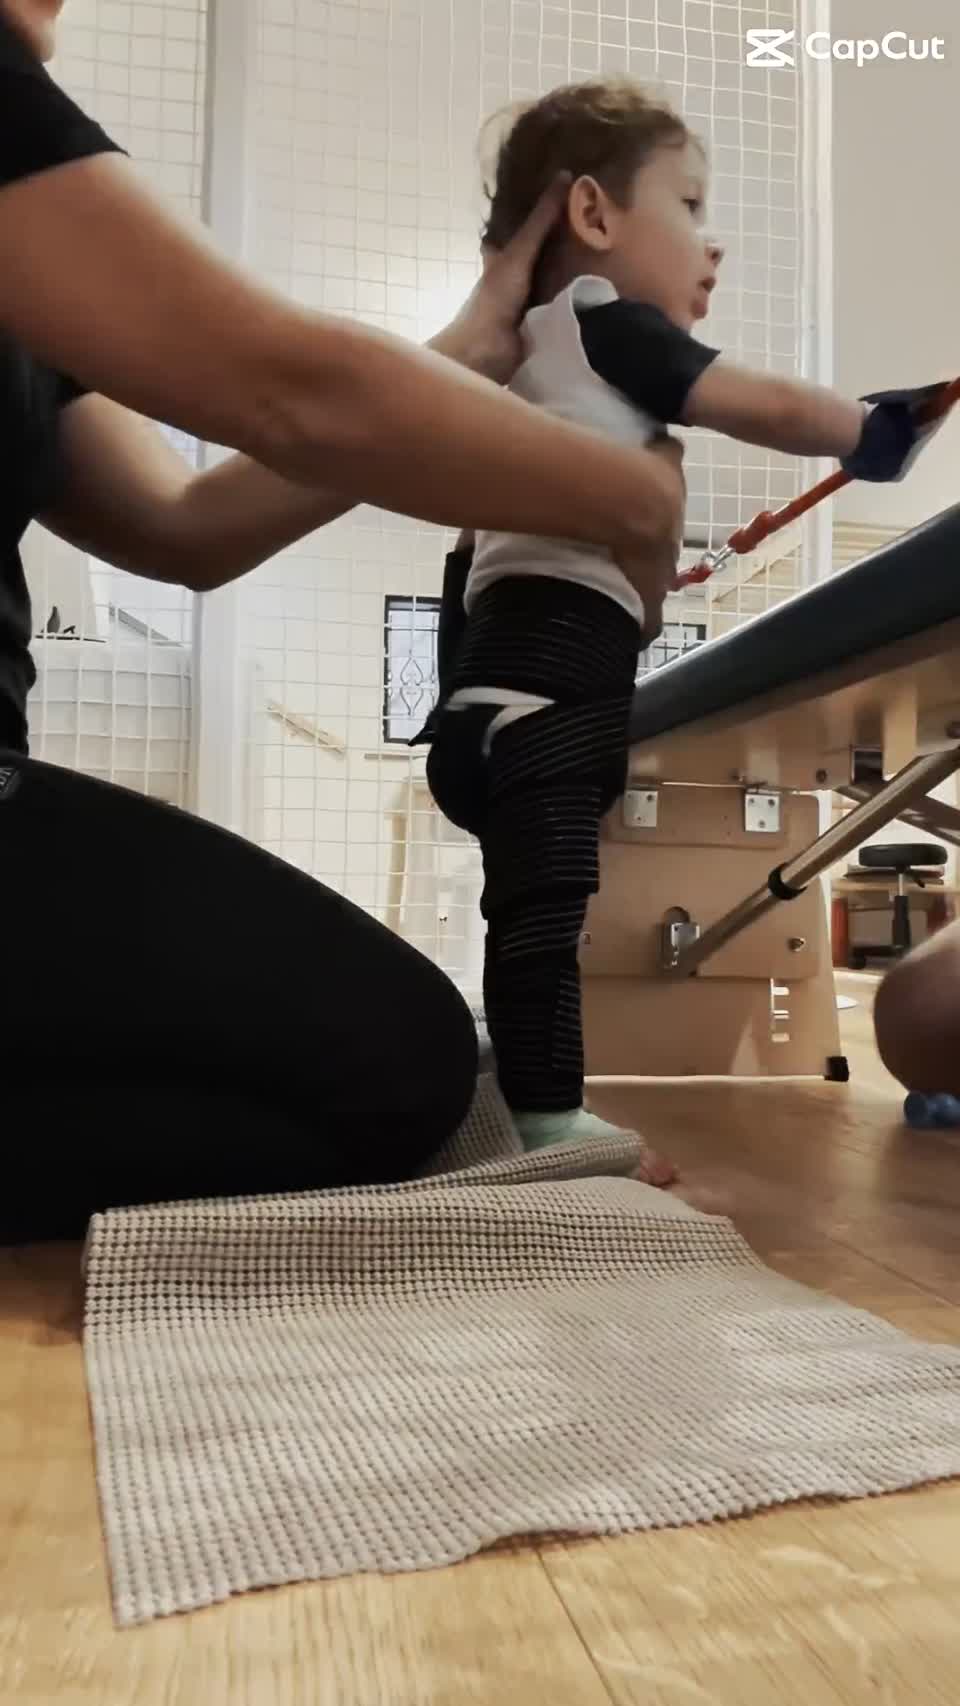
Week 1 — POEE & Weight-Bearing Activation
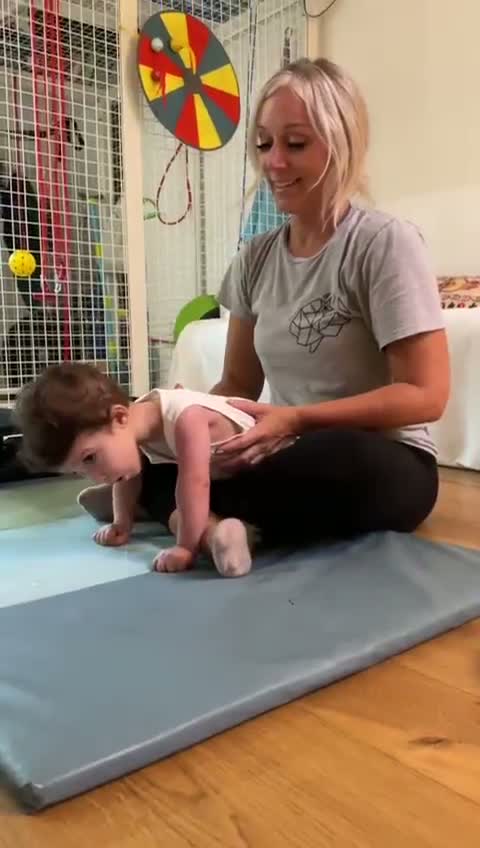
Prone on Extended Elbows (POEE) — Toddler
Prone on extended elbows builds the weight-bearing base the arm needs before it can reach. Handling supports the shoulder girdle while the child holds the position actively.
Coaching cues
- Set the hands under the shoulders with the palm open and fingers spread.
- Facilitate at the scapula and trunk — avoid pulling on the wrist or fingers.
- Keep the head up and eyes on a target to recruit the extensors.
- Work in short holds with rest, not one long hold to fatigue.
Key takeaways
- Weight-bearing through an open hand is activation and sensory input in one.
- Stability at the shoulder girdle is what makes distal control possible.
- Grade the challenge with surface height before you reduce your hands.
Playback, download and printing are available to course members.
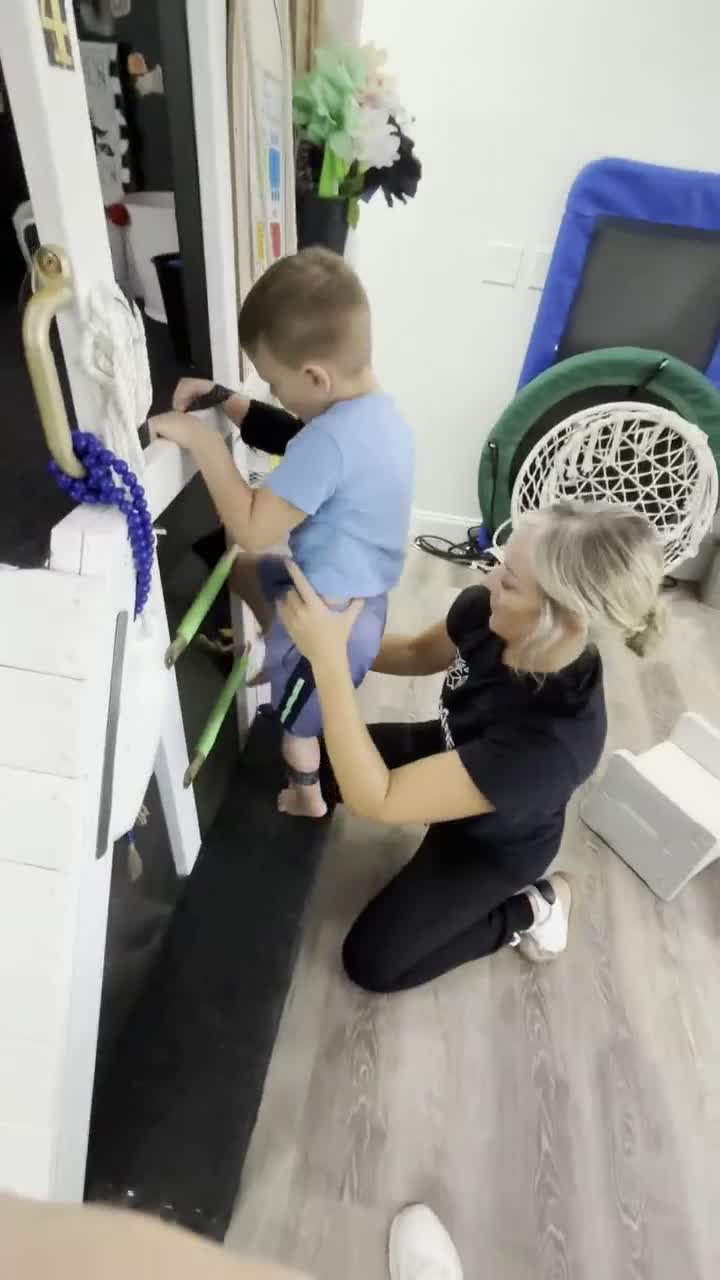
Week 1 & 2 — Postural Control, Stability & Activation
Arm Grasp for Stability (POEE)
The affected arm holds while the body moves around it. Grasp becomes the anchor for postural work instead of the end goal.
Coaching cues
- Set the grip first, then ask for movement of the trunk or legs.
- Watch for wrist flexion creeping in — reset the position rather than pushing through it.
- Count out loud so the hold is predictable and the child can pace effort.
Key takeaways
- Sustained grasp trains endurance that isolated repetitions do not.
- Postural demand and hand demand can be trained in the same rep.
Playback, download and printing are available to course members.
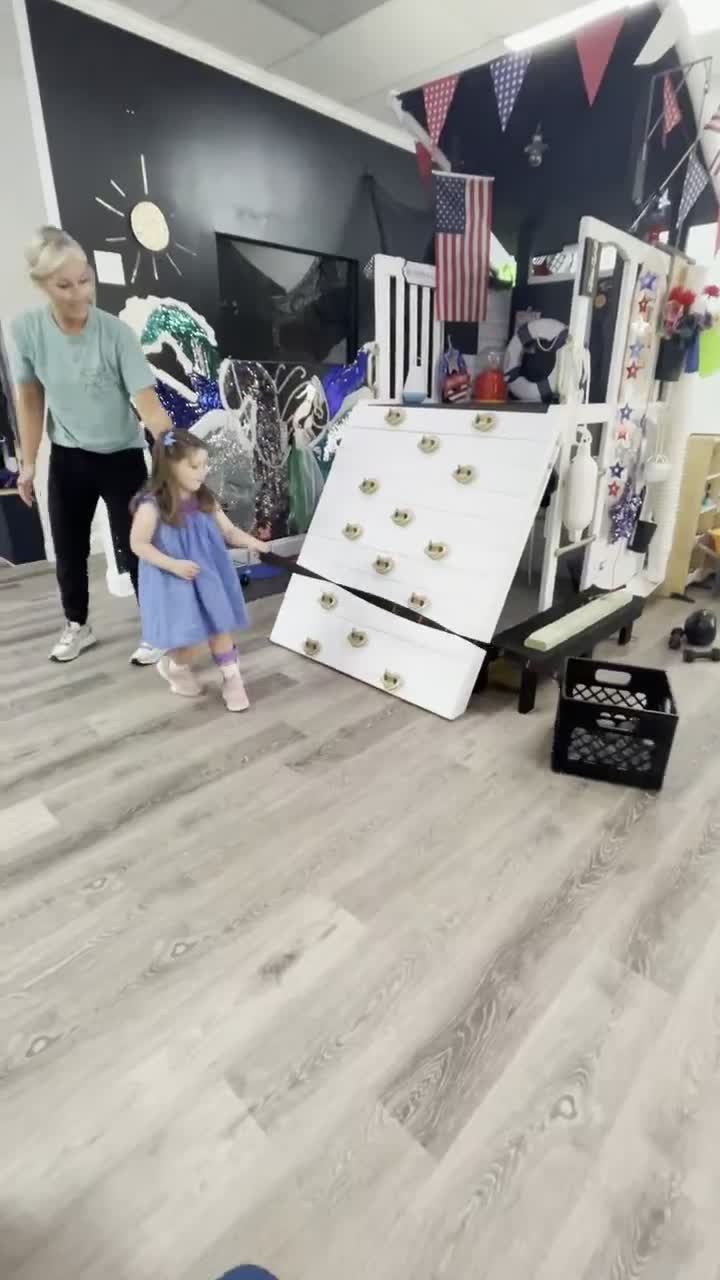
Week 1 & 2 — Postural Control, Stability & Activation
Arm Grasp Pull — Body Ladder
Hand-over-hand pulling drives the body forward, loading the shoulder through range while the trunk stays organized.
Coaching cues
- Anchor the pull low so the shoulder works below 90° before you go overhead.
- Alternate hands to keep both sides in the pattern.
- Stop the set when the trunk starts to twist to substitute for the arm.
Key takeaways
- Pulling patterns recruit the whole chain from hand to hip.
- Bilateral alternation keeps the stronger side from taking over.
Playback, download and printing are available to course members.
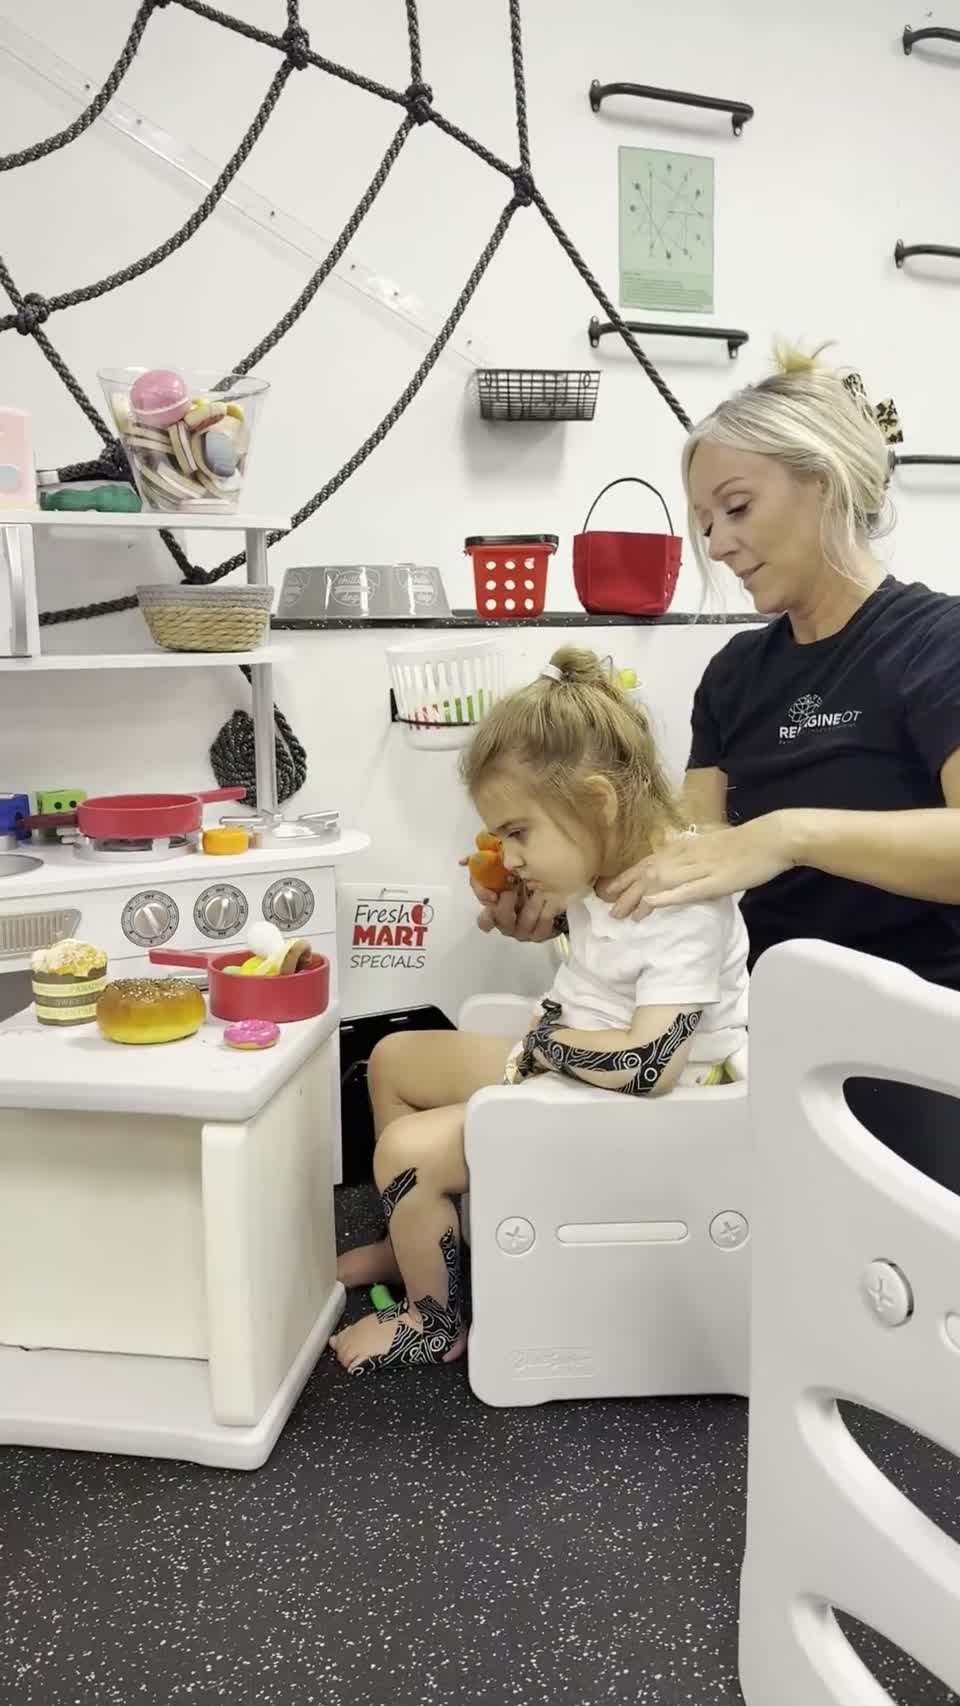
Week 1 & 2 — Strength & Stability
Heavy Pull with Grasp
Resistance gives the hand a reason to hold on. Heavy work builds grip endurance and proximal strength at the same time.
Coaching cues
- Load enough that the child has to set the grip deliberately, not so much that the wrist collapses.
- Keep the elbow tracking close to the body on the first pulls.
- Use full-effort sets of 5–8 with real rest between them.
Key takeaways
- Grip endurance is trainable and it transfers to carrying and dressing.
- Heavy work also delivers proprioceptive input that calms and organizes.
Playback, download and printing are available to course members.
Week 1 & 2 — Dissociation, Postural Stability & Controlled Reach
Sit with Reach — Trunk Stability & Dissociation
Reaching across and away from midline in sitting teaches the trunk to hold while the arm travels — the definition of dissociation.
Coaching cues
- Feet supported, hips back — build the base before asking for reach.
- Move the target through arcs: across midline, overhead, then down and out.
- Look for the trunk staying quiet; if it follows the arm, shrink the arc.
Key takeaways
- Controlled reach depends on a trunk that can stay still.
- Range should grow only as fast as control allows.
Playback, download and printing are available to course members.
Week 1 — Functional Grasp, Load & Use
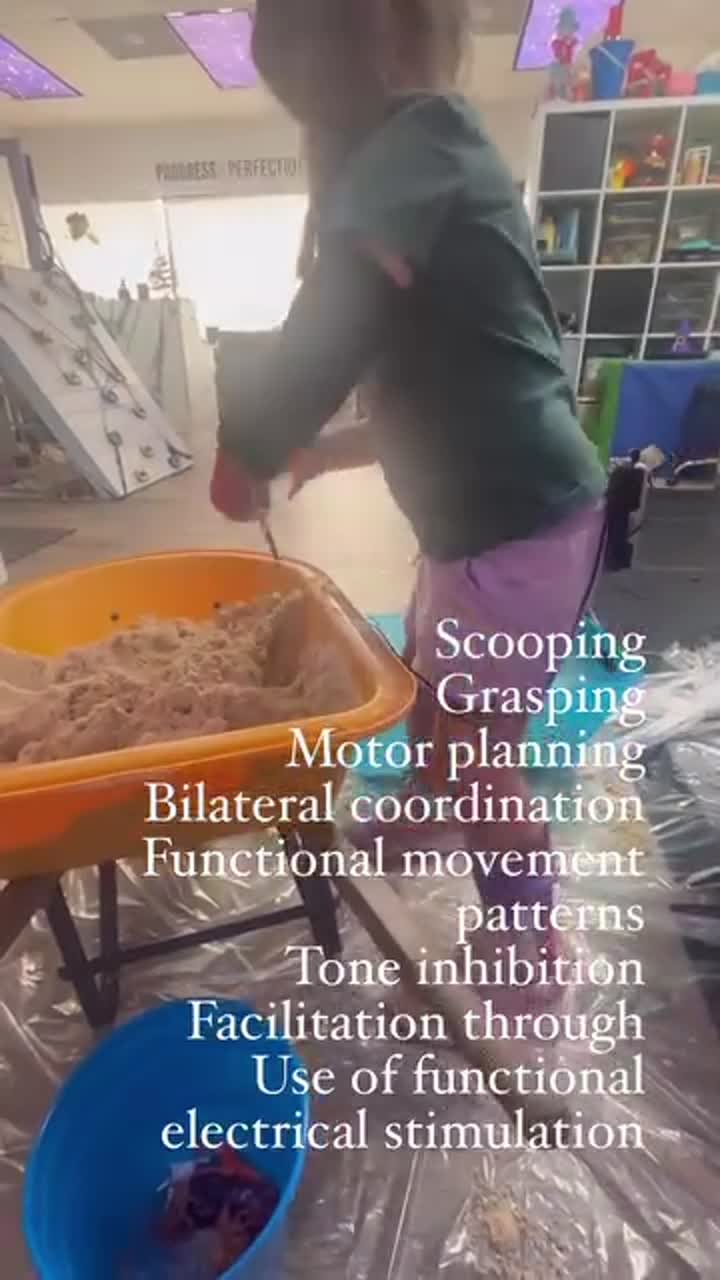
Functional Scooping, Grasping & Bilateral Coordination
A purposeful scooping task combines sustained grasp, bilateral coordination, motor planning and functional repetition.
Coaching cues
- Organize the trunk and shoulder before beginning the scoop.
- Support the assisting arm only as much as needed to keep both sides involved.
- Use a manageable load so the wrist stays aligned through the full movement.
Key takeaways
- A meaningful task can train grasp, load and coordinated movement in the same repetition.
- Reduce the load before reducing the child's active participation.
Playback, download and printing are available to course members.
Week 1 — Stabilize, Reach & Use
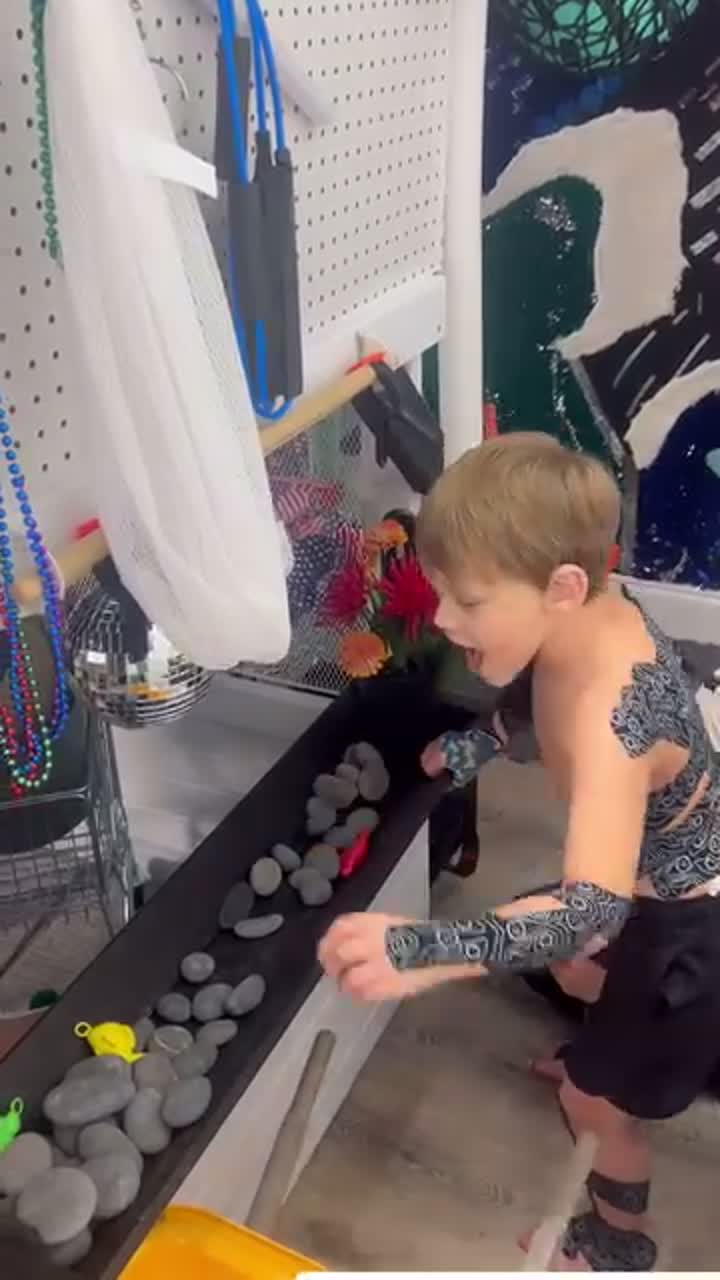
Loaded Reach in a Functional Task
Repeated reaching into a motivating play task builds shoulder stability, wrist control and purposeful arm use.
Coaching cues
- Set the shoulder and trunk before each reach.
- Place targets at varied heights while preserving wrist and elbow alignment.
- Pause or shorten the reach when shoulder hiking or trunk substitution appears.
Key takeaways
- Functional repetition turns isolated movement into useful arm control.
- Quality alignment matters more than reaching farther.
Clinical library
Protocols & competencies
The neurorehab protocols and hands-on skills that run underneath all four weeks.
Guided cohort
Apply the curriculum with live support
$350
Clinician-Led Cohort in SKOOL
September 15 – October 9, 2026
Weekly live Q&A and coaching, direct clinician feedback, peer support, interactive community access, and practice accountability.
Private 1-on-1 support
Book a therapist or coach session
Bring a case to an Arm Optimize Therapist for movement analysis and progression, or work with an Arm Optimize Coach on pacing and daily implementation.
Clinical consultation with a licensed therapist
- 50 minutes, 1-on-1
- Private video session, scheduled by email
Clinical reasoning, movement analysis, and protocol progression stay with a licensed therapist. This session is for the decisions that change a plan.
What this session covers
- Clinical caseload consultation and case review
- Individualized movement analysis from your video
- Clinical protocol progression across the 6 Pillars
- Handling, positioning, and dosing adjustments
- Precautions, red flags, and referral decisions
Scope of this session
- Not included: A diagnosis or a substitute for your child's own treating therapist
Implementation support for the plan you already have
- 50 minutes, 1-on-1
- Private video session, scheduled by email
A coach helps you carry out a therapist-approved plan: pacing, setup, and accountability. Coaches do not change clinical decisions — they flag concerns and refer back to your therapist.
What this session covers
- Implementation support for your current home plan
- Daily home practice pacing and realistic scheduling
- Equipment and kit usage guidance
- Accountability and routine check-ins
- Troubleshooting setup, motivation, and reps
Scope of this session
- Not included: Changing protocols, dosing, or clinical decisions — those go to a therapist